Immerse yourself in a world where noisy distractions fade away, leaving a serene, quiet oasis. Whether it’s traffic outside or household clatter, unwanted noise can disrupt your peace. You might wish for a simple solution, and installing sound deadening offers exactly that. This guide walks you through straightforward steps to reduce noise effectively, transforming any space into a haven of tranquility. Begin your journey to a quieter space by understanding how sound deadening works. While some think it’s best left to professionals at an Car Audio Installation in San Leandro, it’s an achievable project with guidance. By learning to install sound deadening yourself, you gain control over your environment, enhancing comfort and concentration. Let’s dive into the essentials of creating a noise-free zone that suits your lifestyle.
Understanding Sound Deadening Principles
Sound travels as waves and vibrations through air, solid materials, and surfaces. When vibrations hit walls or panels, they can bounce back and create echoes. Sound deadening adds materials that absorb or block these vibrations, stopping reflections and reducing noise transmission. Most sound deadening materials combine foam, rubber, or dense composites. These layers trap sound waves and convert energy into small heat amounts, effectively reducing perceived volume. Installing sound deadening creates a barrier that slows and weakens noise before it reaches your ears. This principle works for home offices, recording studios, or even vehicle interiors. Understanding these ideas helps pick the right approach, making the installation more effective.
Benefits of Installing Sound Deadening
- Noticeable reduction in background noise, aiding focus and relaxation.
- Improved acoustics for home theaters or recording areas.
- Added privacy by keeping conversations in and external chatter out.
- Enhanced comfort in vehicles by cutting road and engine noise.
- Protection from constant loud sounds, reducing stress and fatigue.
These benefits combine to create an environment that feels safe, private, and tailored to your needs. Consider reading more about Car Audio System Planning to complement your space’s improvements.
Assessing Your Space for Sound Deadening Needs
Before buying materials, evaluate where noise enters or bounces around. Walk through your space and listen for echoes, rattles, or hums. Tap walls, doors, and windows to find thin or hollow spots. Note areas with loudest noise—they become priority treatment zones. Measure roughly how much surface requires coverage. Sketch a floor plan, marking doors, windows, and corners. This helps estimate material quantities and avoid extra trips to an How to Install a Car Amplifier shop. A clear plan saves time and makes installation smoother and organized.
Choosing the Right Sound Deadening Materials
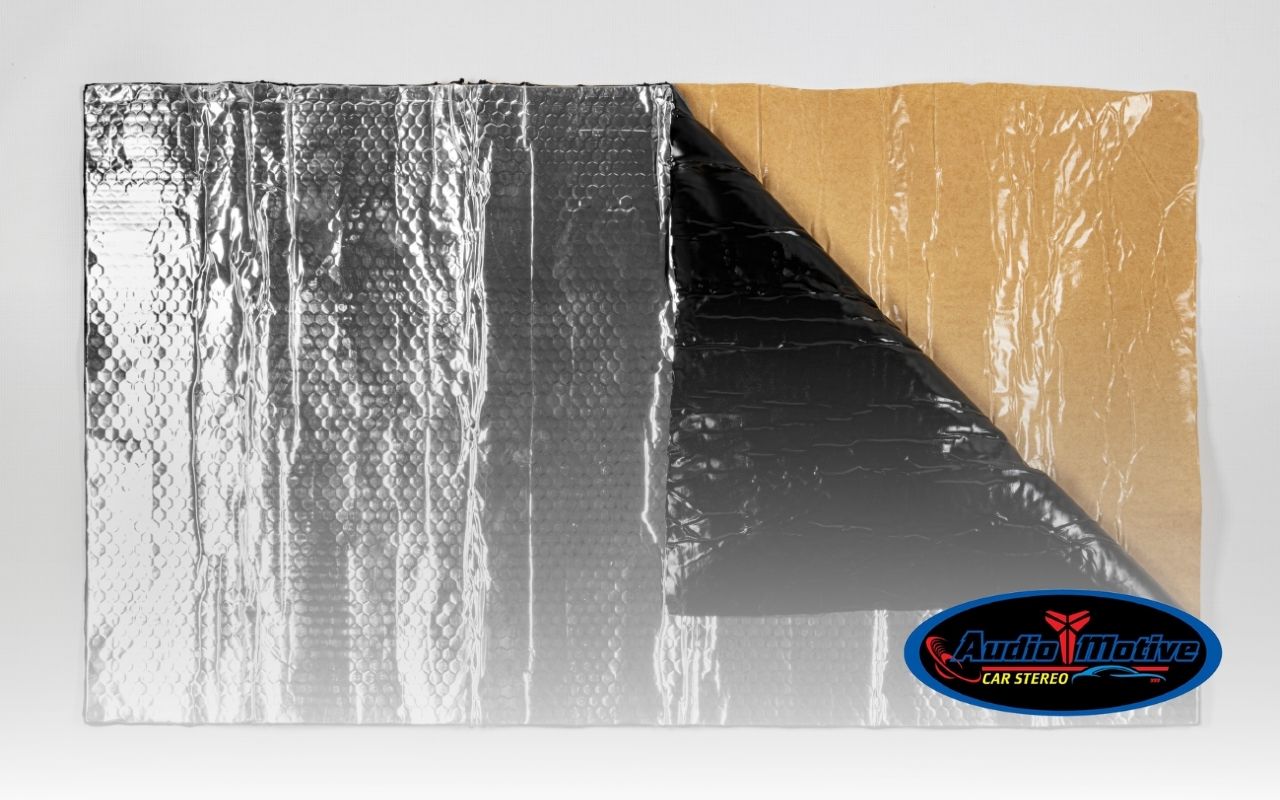
Selecting the right product is key. Options include self-adhesive butyl rubber mats, foam panels, and mass-loaded vinyl sheets. Rubber mats work on metal surfaces or flat areas, commonly in cars and garages. Foam panels absorb echoes in living rooms or studios due to open-cell structures. Mass-loaded vinyl adds weight and density, acting as a strong barrier against noise. Compare material thickness, cutting ease, and adhesive quality. Thicker sheets block more noise but can be harder to handle. Foam is lighter and easier to trim but may require layers to match rubber or vinyl’s blocking power. Match materials to your space’s demands and comfort with installation. For guidance, search for “auto audio installation near me” to see professional setups.
Tools Required for Installing Sound Deadening
- Utility knife or heavy-duty scissors for trimming mats or foam.
- Roller to press material flat and ensure adhesion.
- Measuring tape or ruler for precise cuts.
- Gloves to protect hands from sharp edges.
- Cleaning cloth with mild solvent or rubbing alcohol for prep.
- Optional: heat gun to soften mats for curves, marker for cut lines.
Having the right tools allows DIY installation with professional-level quality and efficiency.
Preparing Your Space for Installation
Clean surfaces thoroughly before applying any material. Use a cloth with rubbing alcohol to remove dust, grease, or old adhesive. This ensures firm adhesion. In vehicles, remove door panels or trim carefully for full access. Measure and mark areas to cover. Cut mats to fit closely around speakers, windows, or curves. Keep small offcuts for gaps or corners. Once cleaned, cut, and lined up, peel back the adhesive and begin installation confidently.
Step-by-Step Guide to Installing Sound Deadening
Peel a small portion of backing from the first sheet. Align it with the marked area, then press the exposed edge to the surface. Gradually remove the rest while smoothing material down. Work slowly to avoid wrinkles or trapped air bubbles. Use a roller to press each section firmly, moving from center outwards. Apply extra pressure along edges and corners. Overlap adjacent pieces slightly, usually 1/8 inch, to prevent gaps. Continue until all priority zones are covered, then inspect and re-roll any loose spots.
Tips for Maximizing Sound Deadening Effectiveness
- Layer materials: rubber mat first, then foam for absorption.
- Seal joints, seams, and edges where noise sneaks through.
- Treat both door skin and inner panel in vehicles.
- Leave at least an inch of clearance around vents or speakers.
Proper layering and sealing enhance performance, ensuring both low and high-frequency noise is managed effectively.
FAQs About Installing Sound Deadening
1. Can I install sound deadening myself?
Yes, with proper guidance and tools, anyone can complete the installation successfully.
2. How long does the installation take?
Time depends on space size, materials, and prep work, usually several hours for a typical room or vehicle.
3. Which materials are best for heavy noise?
Butyl rubber mats and mass-loaded vinyl provide strong blocking for low-frequency and impact sounds.
4. Do I need special tools?
Basic cutting tools, a roller, gloves, and cleaning supplies are usually sufficient, though optional heat tools can help.
5. Will sound deadening improve car audio quality?
Yes, reducing noise and vibrations enhances clarity and bass response in vehicle audio systems.
Troubleshooting Common Sound Deadening Installation Issues
If you spot air bubbles after applying a mat, simply peel back that section and reapply, using the roller to push out the trapped air. For edges that lift over time, apply extra heat with a heat gun or hair dryer, then press down firmly. A bit of extra warmth improves adhesion.
Should you find noise still leaking in, check for missed spots around corners, vents, or mounting holes. Trim and fit smaller pieces of material into these areas. In vehicles, rattles can persist if screws or clips weren’t put back correctly—double-check that all panels are tightly secured after installing sound deadening.
Enjoying Your Tranquil Environment
By following these clear steps, you can install sound deadening in any space—whether a home office, living room, or vehicle—with confidence. The right materials, tools, and prep work make all the difference in achieving a truly quieter zone.
The extra effort pays off quickly in comfort, focus, and overall well-being. Say goodbye to outside noise and hello to a peaceful retreat you designed yourself. Now, take a moment to enjoy the calm you’ve created.