How to set amplifier gain with a multimeter can make or break your car audio quality. When it’s done right, your music stays crisp and clear. Also, it helps you avoid distortion that can ruin your favorite tracks.
Many drivers guess the gain and end up with clipping and speaker damage. However, you don’t need to be an expert. With a multimeter and a simple process, Audiomotive can help you tune your system for clean, balanced sound.
Understanding amplifier gain and why it matters
Start by understanding what gain does. Gain controls how much signal from your head unit gets boosted before it reaches the speakers. Therefore, correct gain gives you loud, clean audio without pushing volume too high. In fact, How to set amplifier gain with a multimeter helps you reduce noise and distortion.
If gain is too low, you may crank volume and hear hiss. On the other hand, too much gain causes clipping and can damage your gear over time. To go deeper into pairing power and drivers, explore matching your amp to your speaker for a smoother setup with Audiomotive.
- Gain is not a volume knob, so don’t treat it like one.
- Low gain can force high volume and add hiss.
- High gain can cause clipping and speaker stress.
- Proper tuning supports speaker sensitivity matching.
Tools you need before you start
Before you begin, gather the basics for set amp gain multimeter work. First, use a reliable digital multimeter with a DC voltage mode. Next, get a test tone track or a tone generator app. Also, keep insulated test leads ready for steady contact.
You may also want a screwdriver for the gain control. In addition, have a notepad for readings. If you’re reviewing your signal chain, Audiomotive suggests learning about choosing the right RCA cables to reduce noise issues.
- Digital multimeter (DC voltage mode)
- Test tone (50–100 Hz) from a CD or app
- Insulated probes or alligator clips
- Screwdriver for gain adjustment
- Notepad for target voltage and results
Safety steps before adjusting gain
Safety comes first, so check your vehicle’s electrical system before touching anything. Disconnect the negative battery terminal to reduce risk. Also, avoid loose jewelry and clothing near wiring. Audiomotive recommends working in a calm, well-lit space.
- Disconnect the negative battery terminal first.
- Wear eye protection when working near power cables.
- Wait for the amp to cool before touching heat sinks.
- Keep tools away from exposed terminals.
Find the gain control on your amplifier
Look for a small knob labeled “Gain,” “Input Level,” or “Sensitivity.” It’s usually near other controls like crossover or bass boost. If there’s a cover, remove it gently. Then make sure you can reach the control without pulling wires.
If the amplifier is under a seat, reposition carefully. That way, you keep connectors safe and the process stays smooth. This step sets you up for accurate readings and fewer mistakes with Audiomotive guidance.
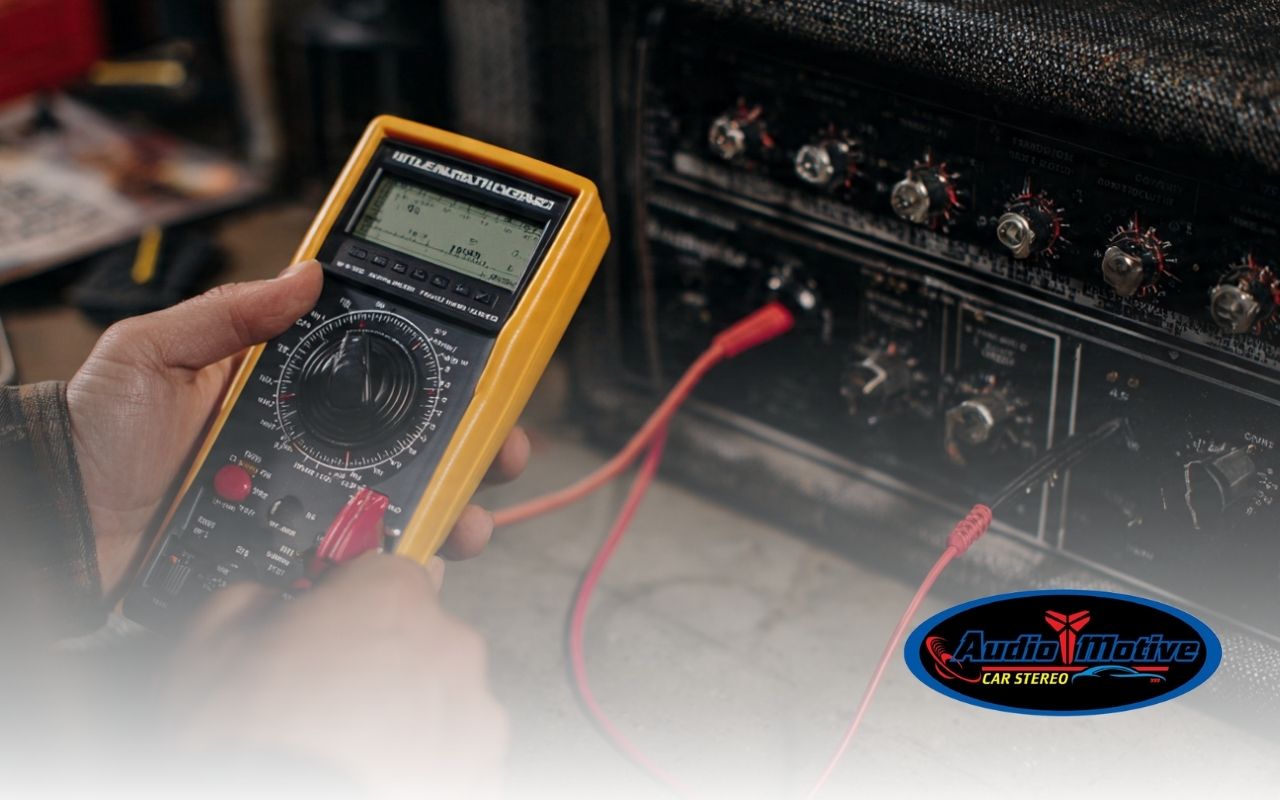
Connect the multimeter for accurate readings
Next, connect the multimeter to the amplifier’s speaker outputs to read voltage in real time. Set the meter to DC voltage mode first. Then place the red probe on the positive terminal and the black probe on the negative terminal.
Make sure the probes do not touch each other. Otherwise, readings may jump or become unsafe. This approach reduces guesswork, so How to set amplifier gain with a multimeter becomes a repeatable routine for Audiomotive installs.
Set the multimeter to the right range
Set your multimeter to a range that covers 0–20 volts DC. If your meter supports auto-range, turn it on to simplify steps. Also, reset the meter for a clean baseline before you read output.
If the display jumps, switch to a lower range for better precision. This is important because it supports speaker sensitivity matching and helps you avoid clipping car audio during tuning.
Adjust the gain step by step
Play a steady test tone and set your head unit to about 75% volume for consistency. Then turn the gain knob slowly while watching the voltage reading. As you turn the knob, voltage will rise. Stop when you reach the target voltage listed for your amp setup.
Tiny turns can change voltage fast, so go slowly. This is the core of How to set amplifier gain with a multimeter, and it helps keep your sound clean without harsh edges. If you want a pro-level setup, Audiomotive can help through car audio installation.
Frequently Asked Questions
Is gain the same as volume?
No. Gain matches input signal to the amp, while volume controls how loud the source plays.
What is the biggest risk of setting gain too high?
The main risk is distortion and clipping, which can overheat speakers and damage them.
Can I do set amp gain multimeter tuning without a test tone?
You can, but results are less consistent. A steady tone makes readings more reliable.
How do I avoid clipping car audio after setting gain?
Use clean source levels and back gain down slightly if you hear harshness on bass hits.
Why does speaker sensitivity matching matter?
It helps balance loudness and power needs, so speakers play cleanly without strain.
Test and fine-tune for best sound
After setting the gain, play several songs at normal listening levels. Listen for buzz, crackle, or harshness. Bass-heavy tracks can reveal issues faster, so test them too. If you hear distortion, lower the gain slightly until it clears.
For multi-channel amps, tune each channel one at a time. Then play a full mix and check balance across seats. When you want hands-on help from Audiomotive, use the Audiomotive contact page to discuss your setup.
Enjoy your clean, powerful car audio
Now you know How to set amplifier gain with a multimeter and keep your system running clean. With the right tools and careful steps, you can protect your speakers and enjoy better clarity. As a result, every drive can sound smoother and more exciting.